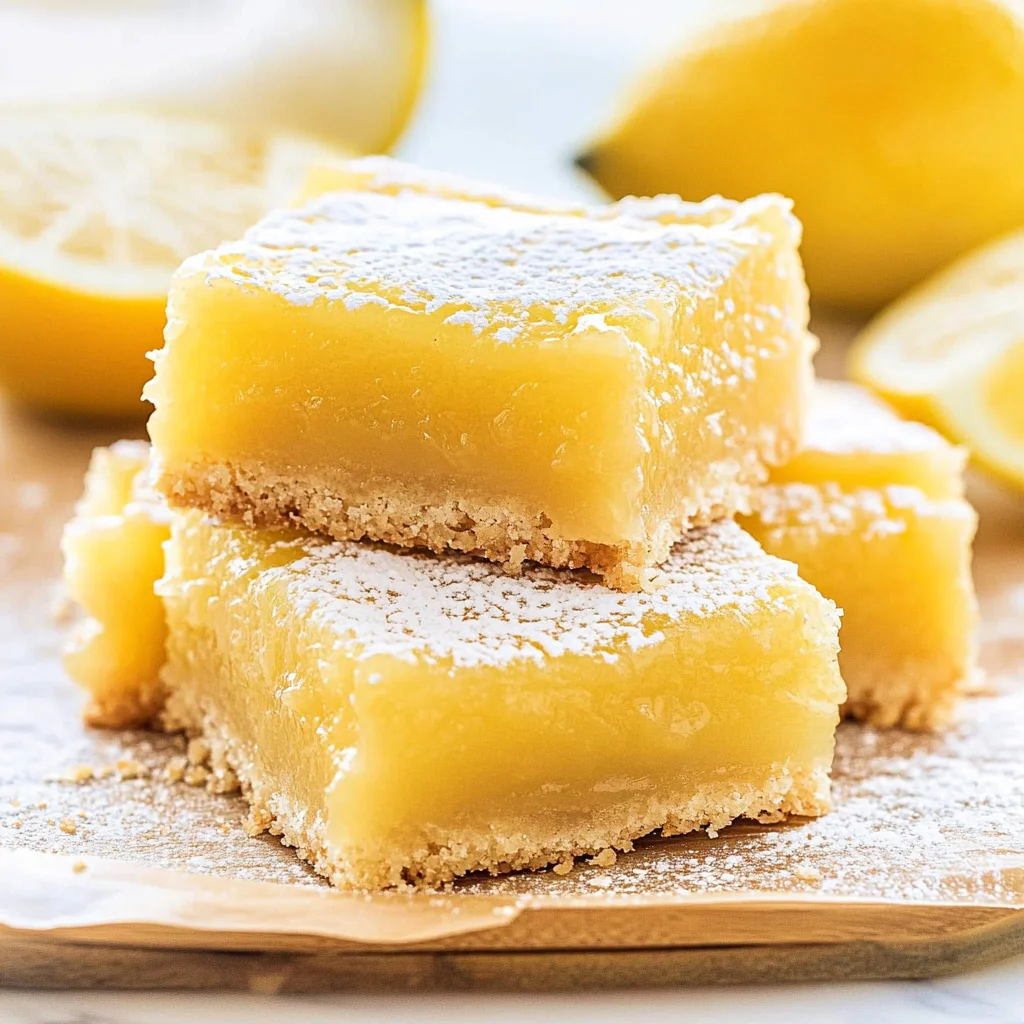
Imagine sinking your teeth into a vibrant lemon bar, where the zesty tang dances playfully on your tongue, complemented by a buttery shortbread crust that crumbles delightfully with each bite. The aroma of fresh lemons wafts through the air, beckoning you closer to this sun-kissed treat that promises both refreshment and indulgence, making it an irresistible addition to any gathering.
As I recall the summer afternoons spent in my grandmother’s kitchen, the joy of her lemon bars brightening up even the cloudiest days comes flooding back. These delightful squares are not just desserts; they’re the perfect companions for picnics, potlucks, or simply a cozy evening at home when you crave something sweet yet sophisticated. Get ready to experience a flavor explosion that is as uplifting as a sunny day!
Why Will You Keep Making Lemon Bars?
Deliciously tangy and sweet, these lemon bars are a perfect balance of flavors that will brighten your day. Quick to prepare, you can whip them up in just 15 minutes, making them ideal for spontaneous cravings or last-minute gatherings. Buttery shortbread crust melts in your mouth, providing a delightful contrast to the zesty filling. Versatile treats, they shine at picnics or as a comforting snack at home. With only a handful of ingredients, they’re both simple and satisfying — it’s no wonder everyone loves these lemon bars!
Lemon Bars Ingredients
For the Crust
- 1 cup unsalted butter (softened) – This rich butter provides a deliciously tender texture for your Lemon Bars.
- 1/2 cup granulated sugar – Sweetness balances the tangy filling and enhances the buttery flavor.
- 1 cup all-purpose flour – Gives structure to the crust, creating a perfect base for your bars.
- 1/4 teaspoon salt – A hint of salt enhances the flavors and balances the sweetness.
For the Filling
- 1 cup granulated sugar – This sweet component is essential for offsetting the tartness of the lemon juice.
- 2 large eggs – Eggs provide essential binding and richness to create a creamy filling.
- 1/4 cup fresh lemon juice (about 2 lemons) – Freshly squeezed juice imparts that bright, tangy flavor that makes these Lemon Bars irresistible.
- 1 tablespoon lemon zest – The zest adds an aromatic citrus punch, elevating the overall taste profile.
- 1/4 cup all-purpose flour – Helps thicken the filling while keeping it light and smooth.
- 1/2 teaspoon baking powder – This leavening agent ensures a light texture in your luscious filling.
Step-by-Step Lemon Bars

1. Preheat the oven to 350°F (175°C) and grease your baking pan. This step ensures a perfect bake for your delightful lemon bars.
2. Cream together 1 cup of softened unsalted butter and 1/2 cup of granulated sugar in a mixing bowl until the mixture is light and fluffy. This will create a rich base for your crust.
3. Combine 1 cup of all-purpose flour and 1/4 teaspoon of salt with the butter-sugar mixture, mixing until just combined. The texture should be crumbly but cohesive.
4. Press the mixture firmly into the bottom of your prepared baking pan, creating an even layer. It should be nicely compacted to hold up under the lemony filling.
5. Bake for 15 minutes or until the crust is lightly golden. Keep an eye on it; you want that perfect golden hue to complement your tangy filling!
For the Filling:
6. Whisk together 1 cup of granulated sugar, 2 large eggs, 1/4 cup of fresh lemon juice (about 2 lemons), and 1 tablespoon of lemon zest in a separate bowl until smooth. This fragrant blend is the essence of your lemon bars.
7. Add 1/4 cup of all-purpose flour and 1/2 teaspoon of baking powder to the mixture, continuing to whisk until fully incorporated. The filling should be creamy and well-mixed.
8. Pour the filling over your baked crust, spreading it evenly. Watch as it pools beautifully atop that buttery base—this is where magic happens!
9. Return to the oven and bake for an additional 20 minutes, or until the filling is set and slightly springy to touch. The aroma will fill your kitchen!
10. Cool completely before cutting into bars, allowing flavors to meld beautifully as they set up perfectly for serving.
Optional: Dust with powdered sugar before serving for a lovely finish!
Exact quantities are listed in the recipe card below.
Tips for the Best Lemon Bars
- Butter Temperature: Use softened butter for a creamy texture; cold butter can lead to a crumbly crust that won’t hold together.
- Don’t Overmix: When combining the flour and salt into the crust, mix just until combined to keep it tender. Overmixing can make your lemon bars tough.
- Fresh Ingredients: Always use fresh lemon juice and zest for the most vibrant flavor in your filling. Bottled juice lacks that bright tanginess.
- Check for Doneness: The filling should be set but slightly jiggly in the center when you take out the lemon bars. Overbaking can lead to a dry texture.
- Cooling Time: Allow your lemon bars to cool completely in the pan before cutting. This helps them firm up and makes slicing easier without falling apart.
How to Store and Freeze Lemon Bars
- Room Temperature: Keep your lemon bars in an airtight container for up to 2 days. This allows their delightful flavors to shine!
- Fridge: For longer freshness, store lemon bars in the refrigerator in an airtight container for up to 1 week. This helps maintain their tangy filling.
- Freezer: Freeze lemon bars wrapped tightly in plastic wrap and then foil for up to 3 months. Thaw in the fridge before enjoying their zesty goodness!
- Reheating: If you prefer them warm, gently heat in a preheated oven at 350°F (175°C) for about 10 minutes. Enjoy your delicious lemon bars!
Lemon Bars Your Way
Feel free to get creative and personalize this delightful treat with these fun twists and swaps!
- Gluten-Free: Substitute all-purpose flour with a gluten-free blend for a deliciously inclusive dessert. Many blends work well, giving you that classic texture without the gluten.
- Coconut Crust: Replace half the butter with coconut oil and add shredded coconut to the crust for a tropical twist. This will infuse your bars with a hint of paradise, making each bite feel like a sunny getaway.
- Honey Sweetened: Swap out granulated sugar for honey in the filling to create a naturally sweetened version. The honey adds a rich depth of flavor that pairs beautifully with the lemony zing.
- Nutty Addition: Mix in finely chopped almonds or walnuts into the crust for an extra crunch. This will not only enhance the texture but also bring a delightful nutty flavor that complements the tangy filling.
- Herb Infusion: Stir in finely chopped fresh thyme or rosemary into the crust for an aromatic twist. Just a touch of herbs can elevate your lemon bars, adding complexity to their sweetness.
- Chocolate Drizzle: Top your finished bars with melted dark chocolate for an indulgent finish. The rich chocolate contrasts beautifully with the bright lemon, creating a decadent experience.
- Spicy Kick: Add a pinch of cayenne pepper or ground ginger to the filling for a surprising heat. This will awaken your taste buds and add an unexpected layer of flavor that lingers delightfully.
Make Ahead Options

If you’re looking to simplify your dessert game, these Lemon Bars are perfect for meal prep and can easily be made in advance. You can prepare the crust up to 24 hours ahead by creaming together 1 cup of softened unsalted butter with 1/2 cup of granulated sugar, then mixing in 1 cup of all-purpose flour and 1/4 teaspoon of salt. After pressing the mixture into the baking pan and baking it until lightly golden, allow it to cool completely. The filling can also be mixed up to 3 days in advance; simply whisk together 1 cup of granulated sugar, 2 large eggs, 1/4 cup of fresh lemon juice, and other ingredients before pouring it onto the crust. When ready to serve, bake the assembled Lemon Bars for an additional 20 minutes until set. This method not only saves time but ensures you have a delightful treat ready whenever the craving strikes!
Lemon Bars Recipe FAQs
What type of butter should I use for the crust?
I recommend using unsalted butter for the crust, as it allows you to control the amount of salt in your lemon bars. Softened butter is key to achieving that light and fluffy texture when creaming it with sugar. If you’re in a pinch, you can substitute with a plant-based butter for a dairy-free option!
How can I tell when the crust is ready?
The crust should bake for about 15 minutes at 350°F (175°C) until it turns lightly golden. Keep an eye on it toward the end of the baking time; you want a subtle golden hue rather than a deep brown. This means it’s just right for holding that delicious filling!
Can I store leftover lemon bars?
Absolutely! Once your lemon bars have cooled completely, store them in an airtight container in the refrigerator. They will stay fresh for about 3-5 days. Just make sure to separate layers with parchment paper to prevent sticking!
Is it possible to freeze lemon bars?
Yes, you can freeze lemon bars! After they’ve cooled, cut them into individual servings and wrap each piece tightly in plastic wrap, then place them in a freezer-safe container. They can be frozen for up to 3 months. When you’re ready to enjoy, simply thaw them in the refrigerator overnight.
What if my filling doesn’t set properly?
If your filling doesn’t set after baking for the recommended 20 minutes, don’t panic! It might need a little extra time in the oven. Just keep an eye on it—look for a firm surface that’s no longer jiggly. You can also check if a toothpick inserted comes out clean; if not, give it another 5 minutes.
How many servings do these lemon bars make?
This delightful recipe yields 4 generous servings, perfect for sharing with family or friends—though you might find yourself wanting more! Each serving contains approximately 200 calories, making them a sweet treat that’s satisfying without going overboard.